Making a brand-new app is thrilling. However, persuading actual users to download and use that program is not always straightforward.
Therefore, you must first publish your app to the App Store to make it downloadable.
The Apple App Store and the Google Play Store, catering to iOS and Android respectively, are the two primary application marketplaces. However, each platform has different policies, regulations, and submission requirements.
This guide’s specific topic is uploading iOS software to the Apple software Store. As soon as the app is published online, it is available for download on an iPhone or iPad.
It’s important to remember that Apple has particular submission requirements. An Apple Developer account is required, and the app’s functionality must match its placement in the App Store. Before approving an application, Apple considers a plethora of additional minute facts.
Apple does this to safeguard its customers. It wants them to be at ease, knowing that any program they download from the program Store is secure and won’t damage their gadgets.
But before submitting an iOS software to the software Store, there are four things you should think about.
You cannot fulfill your app-entrepreneurship goal if you do not publish your app on the App Store. Potential clients can download and use your software through the software Store. Hundreds of apps are released every day these days. Thus, you need to make a statement to draw in more users. Before you submit your software to the software Store, make sure to address these fundamental issues.
Get all of the marketing collateral ready
You must draw in as many clients as possible, so promotional materials will be useful. In addition to the app’s name and description, you also need to have promotional content and screenshots ready. If your program supports multiple languages, ensure that all resources are appropriately localized for each target market.
Assign your account to the app build
Prior to requesting a review, you need to associate the latest app build with your Apple developer account. You can request that your app development team create the necessary certificate and sign the build.
Fulfill all legal obligations
Apple gives consumer data a lot of consideration. Furthermore, every country you intend to target for your iOS app should allow it. Additionally, only content that you or your team has generated should be included in your app. If not, Apple might take your software down from the Store.
Examine Apple’s official policies
Apple has strict guidelines regarding the caliber of apps submitted and the specifics of each app displayed on the Product Page. It’s best to review the requirements prior to submitting any app because the App Store is always changing, and you don’t want to miss any crucial information.
Tips On How to Publish an App to the App Store
Here are a few tips that help you to publish your app on the apple store with ease.
Code signing
Establish a distribution certificate and provisioning profile for iOS distribution.
You have been utilizing a development certificate and provisioning profile only compatible with particular devices. A separate distribution provisioning profile and distribution certificate are required to distribute your software to users or beta testers via the Software Store.
The simplest method is to use Xcode to accomplish this. If you enable automated signing, Xcode will handle device registration, certificate creation and management, and identity signing. If automatic signing is already activated or you don’t require assistance with signing, you can move on to step two.
Prepare the Application for Submission
Finding bugs and issues in your app before putting it on the app store is just one part of the app development process. You still have a few tasks to complete to prepare it for review.
In Xcode, you must first set the bundle ID. This is how the system will uniquely recognize your software. When you build a project from a template, Xcode will assign you a default identifier; however, you should establish a unique one. Please note that it cannot be changed after the bundle ID has been posted to App Store Connect.
The “General” option of your Xcode project editor is where you can change these parameters.
Configuring your app’s build string and version number comes next. The version number is anticipated to appear in the App Store in the format [Major].[Little].[Patch], like 9.11.1.
You must choose an app category when submitting an app to Apple. This is intended to make your app more accessible for users to find in the App Store. Options consist of:
- Books Reference Books Developer Tools
- Medical Navigation with Music
- News Finance Education
- Productivity in Photos and Videos
- Reference for Food and Drink
- Graphics & Design Games Shopping
- Magazines & Newspapers; Social Networking; Lifestyle; Sports; Kids; Travel
- Utility
- Conditions
Your app’s key categories should align with its core function and purpose. Choosing a category that does not match your app’s functionality is against Apple policy and is subject to removal.
You also need to supply a launch screen and create an app icon. As your app opens, the user interface (UI) that shows up immediately disappears as the first screen is loaded is called the launch screen.
Note that it also provides some images while the software loads and a launch screen aims to improve user experience.
Configure the profiles, IDs, roles, and certificates.
After registering, you must configure roles, permissions, certificates, IDs, profiles, and more. Permission must also be obtained from your developers to establish provisioning profiles and certificates. Your developers won’t be able to make any essential adjustments without such permissions.
After obtaining the required permissions, developers can sign their software and indicate its identification and capabilities in the Certificates, Identifiers & Profiles section.
A distribution certificate recognizes your application development group and authorizes you to upload an application to the App Store.
Submit your app build
The developers must then assemble and upload the app’s build. Launch Xcode, open your app, navigate to Signing and Capabilities, select the appropriate account, move on to the General section, and select Upload for the build version. If you are releasing an update, remember to update the build version or set your app version to 1.0.0 if you are releasing a new app.
Once you’ve entered all the required data, select Product -> Archive and allow your program to be bundled.
When finished, the Archives window will appear; from here, you may control every archive that Xcode has created.
Next, upload your build to App Store Connect by clicking the “Distribute App” option. Xcode will automatically generate all of the certificates. If there are any mistakes, you will be notified.
Use App Store Connect to Create a Listing
Members of the Apple Developer Program can upload, submit, and manage apps after they debut through the App Store Connect. It includes test resources, analytics, sales data, and much more.
This is a brief guide on how to make an App Store Connect listing:
- Open your account and log in.
- From the “My Applications” menu, choose the “+” button.
- Incorporate the bundle ID, SKU, main language, and platform (iOS).
- Include the category and name of the app.
- Give the URL of your app’s privacy statement.
- Select the price for your app.
After the review information is accepted, you can also choose how your software is made available.
When you’re finished, you may manually go back into App Store Connect and release it. Alternatively, you can schedule it to go live on a specific date (if it passes certification). Additionally, Apple allows you to choose whether you want the app to be distributed immediately after approval.
Note: These same processes apply regardless of whether you have an Individual or Organization account with App Store Connect.
Take Screenshots of the App Store
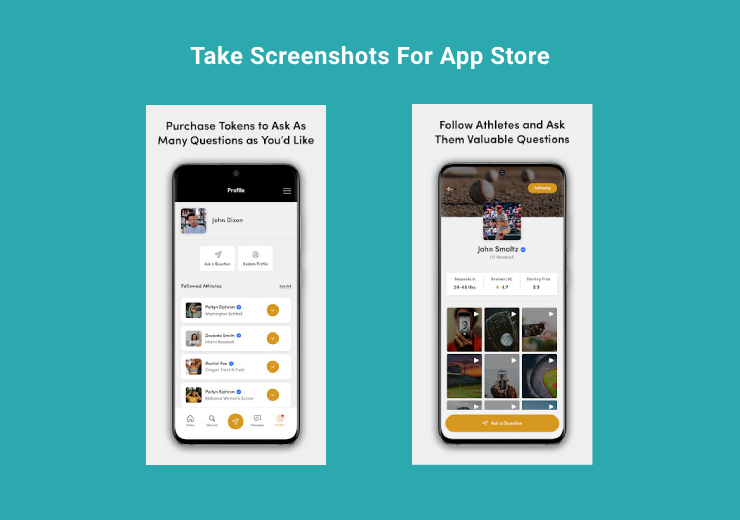
It’s now necessary to prepare your screenshots for the App Store. There are two fundamental methods for this. You may use unprocessed screenshots or a mockup template to display your app.
When people find you in the software Store, these screenshots are the ideal approach to help demonstrate what your software does and how it operates.
Here’s an illustration of how Delta Airlines highlights its best features in-app screenshots:
You do need to take into account the several screenshot requirements that Apple has for app previews. This is due to the wide variety of gadgets available on the market.
Screen sizes for iPhones range from 4.7 to 6.5 inches, while the largest size for an iPad is 12.9 inches.
Check the app
After your app has been submitted to App Store Connect, you must access the TestFlight section and add QA engineers to your Apple team so that they can test the app and find any flaws.
Complete the version details
When you visit App Store Connect, you must select the iOS app you wish to publish. Then, you must include the necessary details and screenshots of the software here (in JPG or PNG format).
Screenshots
A maximum of ten screenshots may be uploaded. Apple mandates that users provide screenshots of their 5.5- and 6.5-inch iPhones. Screenshots must be captivating and educational. The first two screenshots are crucial because they are among the first things a user sees and are displayed in search results (if there is no app preview). There may be variations in screenshots for every supported language.
App sneak peeks
An app preview is an optional, brief film that highlights an app’s main functions. You can add up to three app previews, each lasting up to thirty seconds. Just like screenshots, the app preview can be localized.
Advertisement language
The promotional text is the only field that can be updated without submitting a new software version to the Software Store. Before clicking “Read More,” users can view the promotional field, which can be left empty.
Synopsis
The description field contains every detail regarding the app’s characteristics. It shouldn’t have more than 4,000 symbols.
Keywords
Improve the visibility of your app in the App Store, aid in user discovery, and improve your App Store listing. Keywords must meet the following criteria:
- It has to be less than 100 symbols.
- To divide words within keyword phrases, use spaces.
- To divide keywords and keyword phrases, use commas.
Assistance URL
Users can access support at this URL. It is an obligatory field.
Ideally, you should have a website to correctly link to it from this page. You might use one of the many free website builders instead.
Promotional Link
Users can obtain marketing materials about the app at this URL.
Use Xcode to Upload the App
It’s finally time to upload your app from Xcode. This step should not be done unless you are sure the program is error-free and functions as planned. The app won’t be accepted into the App Store if it doesn’t work.
Note that, 1.0.0 should be the version number for new apps.
Using Xcode 11, the publishing procedure is quite simple. Many extra stages were needed in the past. However, not all the work is completed in a few clicks.
- First, create a complete app archive. In Xcode, navigate your list of simulators and choose “Generic iOS Device” from the menu.
- Next, choose “Archive” and “Product.” Xcode will bundle your app as a result. Depending on its size, this can require a considerable amount of time.
- After this process is finished, simply select the “Archives” tab and click “Distribute App” on the right side of your screen. When asked about your preferred distribution method, choose “iOS App Store.”
To make sure you’re not attempting to upload a malfunctioning app, Xcode will go through a few procedures. Xcode will probably halt the Upload and prompt you to add any missing assets if there is an issue or something is missing.
When the Upload is successful, a message should appear on the screen confirming the Upload.
Apply for review
The Xcode archive has already been submitted to App Store Connect. However, you might still have to wait for App Store Connect to finish processing the Upload. Therefore, if it doesn’t appear in your account straight away, don’t panic.
When the archive is formally processed and prepared for use, you should receive an email. By doing this, you may avoid having to constantly check manually and save some time.
To submit an archive for review, select it and click the button in the upper right corner of the page.
According to Apple, 50% of mobile apps are assessed in less than 24 hours, and 90% are approved in less than 48 hours. You should receive a response in the next two days if your submission is complete.
After review, the app’s status will be updated, and you’ll receive a notification.
Final Crux
It could seem a little scary to publish an iOS app and go through the Apple review process, mainly if you’ve never done this before. However, we at Onyxtec will help you handle the publication procedure of the IOS app with greater ease.
Your personal Google and Apple Developer accounts must still be created, but our team will do most of the work. Therefore, most of the actions in this guide should not concern you.
Request a consultation if your app project is still in the planning stages to determine whether Onyxtec is the best partner to help you reach your objectives.
FAQ
How much time does it take to be approved in the App Store?
App clearance typically takes one to three days. If approved, your app may take up to 24 hours to appear in the App Store. Here is the current average time for app store reviews.
How is your application turned down?
Before you may submit your application for evaluation again, you will need to make the required corrections. If you have questions, use the Resolution Center in App Store Connect to contact Apple. If you think your application was rejected unfairly, you can also file an appeal and take the matter further.
Performance issues are among the most frequent causes of Apple App Store rejections. Ensure that your application is finished, that you have tested it extensively, and that all bugs have been fixed. Using a bug-reporting tool during beta testing may lessen the likelihood that your software will be rejected for performance-related reasons.